An important detail in the interior of any home is the floor covering. The floor in the house more than other elements affects the overall perception of the room, so its design is given no less importance than the arrangement of walls and ceilings. Recently, the leading position is occupied by flooring, which, as a rule, is decorated with paint. You can paint yourself at home, but before you start work, all the details of the process should be studied.
Features
Any types of repair work have their own characteristics, and floor painting is no exception. Most often, wooden flooring is chosen as flooring. Before buying paint or varnish for the floor, you need to understand the origin of the existing flooring. The material used for its manufacture is important when choosing paint or varnish, as well as the means by which preparatory work will be carried out. It is possible to paint the floor using acrylic, oil, wear-resistant and universal rubber paints.
It is necessary to take into account the features of the room where the paint work is planned. The intensity of use, exposure to external factors, average temperature and humidity are very important when choosing a paint, since the life of the painted surface will depend on its properties. If the surface itself was previously painted, it is necessary to determine the degree of compatibility of the used paint with a new tool.
If the goal is not updating, but applying a new layer, then you must either primer or treat the surface with a special composition before applying the decorative layer.


What to paint?
Today, there are various types of paints that can be selected for both wooden flooring and concrete floor. There are two types of means with which you can cover the floor: colorless and opaque. Colorless varnishes are excellent for wooden surfaces. They are durable and resistant to fading, and also dry quickly. Decorative varnishes have many tones, thanks to which the wooden surface can be given a beautiful shade without blocking the structure of the tree. Beech, oak and other expensive floorings have a beautiful structural pattern, and varnish having a translucent or transparent consistency will perfectly emphasize it, give it shine and protect it from moisture.
It is worth remembering that the varnish is not resistant to various mechanical damage, and therefore they are better off not covering surfaces in rooms with high traffic. Otherwise, it is worth applying additional impregnation.
Do not use this tool to cover floorings made of soft tree species (spruce, pine). They are best treated with paint that maximally protects the surface from mechanical damage.


Which paint is better?
Paints of various colors are divided into acrylic, oil, wear-resistant and rubber, depending on the chemical composition:
- Non-toxic acrylic paintshaving a water base, perfectly paint over the surface of solid wood. They are characterized by sufficient strength (service life is approximately 10 years), and therefore are in high demand. The components present in the paint are not afraid of temperature extremes and high humidity, which means that the paint itself is suitable for use in rooms with no heating. When painting, there is no pungent odor, and the surface with the paint dries quickly.
- Water-based are environmentally friendly and safe for the human body rubber paints, which appeared relatively recently, but have already managed to gain popularity. They are characterized by high strength, superelasticity, water resistance and low consumption. The polymers included in the paint protect the wood surface from burnout and temperature changes.


- Oil paints relate to inexpensive and extremely common materials for painting. They have a uniform consistency, are quite resistant to temperature fluctuations. Having a high viscosity, they are ideal for painting OSB panels consisting of glued chips. For such panels, water-based paints are not suitable, since there is a high probability of swelling and bending of the plate. Over time, cracks may form on the painted surface. In addition, the paint dries for a long time and has a very unpleasant odor.
- Unlike oil species, wear resistant paints differ in stability. Surfaces with such a paint are not afraid of either peeling or fading. It is easy to apply a layer, and paints dry quickly enough. Their smell is quite specific, it disappears from the premises only after a few days.


Color schemes and decor
Gone are the days when only one color was used to paint the floor. Brown paint and several shades of it were produced specifically for wooden flooring. Today, manufacturers produce a wide color palette, thanks to which you can choose absolutely any shade. Water-based paints are particularly distinguished by their color scheme. There are both ready-made options, and those that can be given the desired shade, using a special color tool for this. White paint is the basis in which a certain amount of the desired color is added. In order to get the right shade of paint, you can add several colors.
Matte varnishes also have different colors and shades. With their help, you can give any wood flooring a shade of a noble breed. Staining the flooring can be done using one color or shade, evenly distributing the product over the entire surface. There are special devices, stencils, with which the surface of the old floor is transformed by applying a drawing. The technology is simple: a stencil with a carved pattern is applied to the floor surface, and paint is applied to exposed areas.
As a tool, you can use either a sponge or a roller.


Work technology
Floor painting, like any other work, has its own technology. The final result depends on a competent and consistent approach to this type of activity. Before you begin the process, you need to prepare tools that may be needed both during the preparatory work, and for painting the floor:
- The main tool for covering the flooring is the roller. Today, manufacturers produce many of the most diverse in size and material of the rollers: foam, polyacrylic, fur, polyamide and even textured. Each species has its own purpose. For painting the floor, the best option is a fur roller marked with a VMP. They are produced in accordance with GOST and are the most durable in comparison with foam versions, and the layer of paint applied by them will lie evenly.
- For uniform absorption of paint, it is better to purchase a special container with two-level planes. The agent is poured into one half, and the other serves to squeeze the roller.


Surface preparation
Preparatory work is carried out based on the state of the surface of the coating. If the flooring is new, then you need to sand the surface well with a looping machine, then remove dust and debris. If the coating is old, then to begin with, the paint layer is removed using either a mechanical (using a building hair dryer) or a chemical (solvent) cleaning method. The formed cracks are putty, after drying the surface is leveled.
If the coating will be varnished, then the need for a primer disappears. Such floorings are treated with special impregnations that protect the wood from mold, fungi and accidental fire. To prepare the floor for painting, use drying oil or a special primer, which gives the flooring antiseptic properties and prepares the surface.
A smooth and even floor with good adhesive qualities will greatly facilitate the adhesion of paint to the floor.


How to paint?
After preparation, you can start painting the floor in the apartment. There is a certain sequence of this stage of work. Before staining, thorough mixing of the composition in a jar is required to remove clots, and this procedure is carried out regardless of the color (black, white, color) of the paint. Then you can start painting the surface adjacent to the walls, starting from the opposite side of the entrance. It is more convenient to make this with a small brush, as it will not work to paint over each corner carefully with a roller.


After applying a layer around the perimeter, you can start painting the central part of the floor. The applied paint layer should completely dry, and only after that you can proceed with the installation of skirting boards. In order not to stain the wallpaper or other facing materials on the walls, you need to close the part adjacent to the baseboards with masking tape or other improvised means. Next, you can start painting the skirting boards with a narrow brush. After the first layer has dried, the second layer is applied to the baseboard. After waiting for the set time for it to dry on the skirting boards, you can start applying paint to the central part of the surface.
When the painted surface is completely dry, you need to prepare the floor for operation, thoroughly washing it.
Professional Tips
There are several professional tips that can help you achieve the best results:
- Applying any decorative coating requires a clean surface, so the base must not only be cleaned, but also dried after washing. Surface pretreatment is required for floors of any material (concrete, tile, wood, plywood).
- When preparing the surface of a concrete floor, quartz sand should be added to the primer. It will make the floor less slippery. In addition, to increase the strength of the cement surface and get rid of dust, you can use special impregnation topping.
- When preparing a wooden flooring for varnishing, it is better to treat the surface with oil or a composition with wax. This treatment will help protect the surface under intense loads.
- For plywood floors, pre-treatment is best done with an acrylic primer that protects this material well from moisture and mold.
- The readiness of the surface after soil treatment can be checked by placing a palm on the floor. If the composition does not stick to the hand, then you can start painting.
You will learn more about how to properly paint the floor from the next video.
Preparatory stage
In order for the finished coating to turn out to be really high-quality, all actions must be performed strictly according to the instructions. As noted earlier, work should begin with cleaning the floor surface and choosing a material for painting. It’s not worth saving on paint, so it’s better to buy durable and high-quality compounds so that the fresh layer of paint does not begin to fade or peel off the floor within a few weeks after painting.

Such an old floor will require serious preparation
In the room where painting is planned, there should be optimal conditions: normal humidity and temperature range. Detailed information on this can be found in the instructions from the manufacturer. It must be studied before starting painting, so that during or after work you will not encounter any troubles. Also, before starting work, it is recommended to prepare all the tools. This will speed up the painting process.

Preparing for floor painting
Tools and materials
As practice shows, preparatory work takes much more time than painting the floor itself. First of all, you need to take care of the following:

Materials and tools for priming and painting the floor
- paint for wooden coatings,
- solvent for paint (will reduce consumption and improve fluidity of the material),
- large and small brushes (the first for the floor, and the second for coloring the skirting boards),
- paint bath
- Scotch,
- work gloves
- thin stick for mixing paint.

Masking tape can be of different widths
On a note!If there is peeling old paint on the floor surface, sandpaper may be required. If she does not manage, then you can remove the paint with a hard brush.

Paint for wooden floors
Paint selection
For high-quality floor painting in the house, you need to choose the right paint. More recently, oil paints or enamels were bought for the floor, as they were considered the most popular. But now the range of paints and varnishes for finishing wooden floor coverings has greatly increased. Below are the popular types of paints that differ in cost and advantages in use.

Choosing paint for a wooden floor
Table. Types of paints for wooden coatings.
| Title, photo | Description |
|---|---|
| The composition of acrylic paint includes components dissolved in water, so it dries very quickly and does not emit unpleasant odors. The main advantages of the paint are its safety and environmental friendliness. | |
|
| Reliable and wear-resistant paint with a synthetic composition, which within a few hours after painting dries completely. Among the disadvantages of polyurethane paint can be identified increased toxicity. |
|
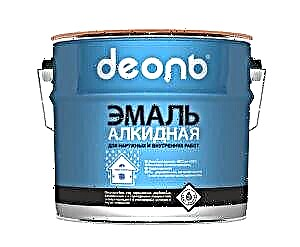
| An excellent coloring agent for hiding minor defects of a wooden floor or its natural pattern. Alkyd paint is actively used for painting indoors and outdoors. The disadvantages of the product include a sharp unpleasant odor that remains in the room even after painting. |
|
| A relatively inexpensive type of paint for wooden coatings, which has a uniform structure and a rich shade. Oil paint is resistant to extreme temperature fluctuations. It is necessary to wait about a day until it dries completely, therefore not all paint oils are used. |
|
| High-quality heat-resistant material used for painting wooden surfaces. Perchlorovinyl paint is available in a wide range of colors, so you can decorate the room in any design. |


Paint for the floor: types and colors
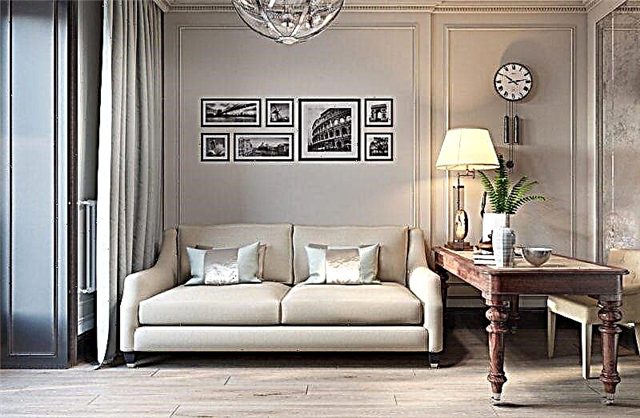
It is not necessary to buy a standard brown paint for painting wooden floors, because if you wish, you can not only give the flooring an unusual look, but also decorate it with a beautiful pattern. Wooden floors painted in bright colors are not uncommon in modern apartments and houses, but with their help the owners will be able to claim originality.

Types of paints for wooden coatings
Among acrylic paints, first of all, we recommend paying attention to the products of the manufacturer from St. Petersburg - the Mitsar company. Resolux Profi-52 is a semi-gloss enamel for concrete and wooden floors. Notable for the following features:
- Lack of smell. Unlike obsolete alkyd materials on an organic basis, Resolux Profi-52 enamel does not smell and can be used to cover the floor even in child care facilities.
- Water resistance. Enamel "Mitsar" is suitable for use in baths, saunas, pools and other rooms with high humidity or constant contact of the coating with water.
- Increased frost resistance. Operation of the coating is possible at temperatures from -15 ° C and above. Such analogues as Tikkurila Betolux Aqua virtually exclude the use on the street and in unheated rooms (garages, factories, warehouses, etc.), since they require a usage mode of at least + 5 ° C.
- Profitable price. The cost of 1 kg of Mitsar paint is 220 rubles. Paints like Tikkurila Betolux Aqua will cost at least four times more. At the same time, for the reason given above, the scope of their application will be limited by the interior of the house or apartment, in contrast to the Mitsar Rezolux Profi-52, which is universal and suitable for outdoor use, as well.

Rezolux - Profi 52
Mitsar has been developing and producing coatings for 12 years. And special attention is paid to the wear resistance of products. So, anticorrosive and acid-resistant enamels of the company were used in the construction of the Leningrad and Kola NPPs. Mitsar also regularly supplies its coatings for organizations within the framework of the State Defense Order, that is, for the production of defense products. The materials of the company satisfy two main conditions of the Gostenders: strict compliance with the necessary parameters such as resistance to aggressive chemical environment and the lowest (up to 4-5 times) price among all offers.
How to paint the floor
If all the tools and materials are ready, then you can proceed directly to painting the floor. Below is a step-by-step instruction for this process, the observance of which will not only speed up the work, but also prevent the occurrence of common errors.
Step 1. Clean the floor surface from dust and dirt, paying particular attention to the gaps between the floorboards. Inadequate cleaning can cause the paint on the brush to mix with the remaining dust and spread over the floor surface.

Clean the floor

Cracks in the wooden floor
Step 2. If dry floor cleaning is not enough, wash it thoroughly with plain water (optional with detergent). Wait until the floors are completely dry.

Carry out wet cleaning
Step 3. Open a can of paint and add a small amount of solvent. This will increase the amount of paint, and it will be difficult to work with a dense composition, so you can not do without a solvent.

Thin the paint with solvent.
Step 4. Stir the paint thoroughly until a homogeneous substance is obtained. It is necessary to interfere until the colors and stains disappear. For mixing, an ordinary wooden stick is suitable.

Step 5. Apply a masking tape around the walls of the room to protect them from paint in the process. The same must be done with stationary furniture, if any.

Glue the masking tape around the perimeter
Note!The masking tape is impervious to all types of paint, so you can not worry about the appearance of walls and furniture. In addition, it is very easy to remove after use, and on the surface after the tape there are no traces.
Step 6. Pour a little diluted and mixed paint into the deep part of the paint tray. A lot of paint is not worth adding, because this can complicate further work.

Pour some paint into a special bath
Step 7. Using a small brush, carefully walk around the perimeter of the room, painting all the skirting boards. To prevent paint from dripping onto the floor during painting, press the brush against the ribbed surface of the paint tray each time after dipping it in the paint.

Paint baseboards indoors
Step 8. Paint the rest of the floor with a large brush, gently spreading the paint on the surface of the floorboards. Instead of a brush, you can also use a roller. During the painting, it is advisable to press the roller slightly against the floor so that the paint gets into all the existing recesses (see How to close the cracks in the floor) and safely fill them.

Paint the entire floor with a roller or a wide brush.

Pay attention to each floorboard.
Step 9. Start painting the floor from the far wall of the room and smoothly move towards the exit.

You need to start painting from the far wall
Step 10. The work on painting the wooden floor is over. Now you can enjoy the finished result.

The floor is completely painted!
To completely dry the floor, you need to wait a few days (if it is warm outside, then the paint will dry in a day). After drying, the floors must be washed with a solution of water and a small amount of vinegar. Only after that paint the room again by applying a second coat of paint. Such a wash significantly speeds up the drying process of the paint, in addition, with the help of vinegar, all oil traces are removed from the surface.

Wash the floor with water and vinegar
Surface drying
After the last coat of paint has been applied, it is necessary to wait some time for it to dry. The optimum temperature for drying is + 20-22 ° C, so it is recommended to paint the wooden floor in the warm season. Even if the paint is completely dry, it is advisable to discard any mechanical stresses on the floor surface at first. Only after 3-4 days from the moment of painting is it possible to fully exploit the floor.

Wood floor drying
There are several factors that affect the drying speed, for example, the level of humidity in the room, the quality of the purchased paint and its chemical composition. All this must be taken into account to give the paint enough time to dry. Only in this way will the finished coating get maximum wear resistance.

How much does a wood floor dry
Follow-up care
Proper painting of a wooden floor is not the only thing that the owners of a house or apartment should know. The rules for caring for a new coating should also be remembered. In fact, the subsequent care is very simple: it is necessary to periodically carry out dry cleaning with a vacuum cleaner or wet with a wet brush and a rag. Regular cleaning will keep the floor surface in perfect condition.

Proper wood floor care
The procedure for restoring a wooden floor is also quite simple. Only occasionally should the surface be treated with a grinder, creating a perfectly even and smooth coating. But if we consider the restoration process from a financial point of view, it will be much easier and cheaper to apply a new coat of paint than to use a grinding machine for restoration.

Secrets of competent care for a wooden floor
Preparation for self-painting the floor
To get high-quality coverage, you need to do everything exactly with the instructions. Work begins with cleaning the surface and choosing the right paint. It is recommended to immediately focus on high-quality and durable compounds, especially if it is planned to finish a cement or concrete base.
Work must be carried out at normal humidity and an appropriate temperature range. Information on this is given in the instructions for the paint, be sure to study it before use.
Preliminary it is recommended to check the surface moisture. To do this, you can take a little plastic tape and leave it on the floor for about a day.
- If condensation appears on the outside of the plastic, you will have to work to reduce air humidity. To do this, you can use special dehumidifiers.
- In the event that condensate is present on the inside of the “probe”, excess moisture is present in the concrete itself. To solve this problem, it is worth leaving one or more heaters and a bag of salt in the room, which will absorb excess moisture.
- Perhaps the reason for the increased humidity in the room is the dilapidated heating pipelines that have served their age. In this case, repair of the coolant or cleaning of pipes and gutters of the water supply system cannot be avoided.
The standard temperature range at which you can paint the floor is in the range of 5-33 degrees. However, it is necessary to further clarify the acceptable indicators in the instructions for the selected paint.
Before painting, the surface must be thoroughly cleaned of all sorts of debris.
Before painting, the surface must be thoroughly cleaned of all sorts of debris
Old paint is usually easily removed with a grinder. It is possible and manually using ordinary sandpaper, but it's too long.
Take furniture and appliances out of the room. Vacuum the floor thoroughly and get rid of any kind of contamination, if any. Use a degreasing agent if necessary.
Wash the floor. To do this, you need a brush, detergent and clean water. Any contamination will lead to the fact that the quality of adhesion of the paint to the surface will significantly deteriorate. Wait for the floor to dry completely.
Get rid of cracks and other damage. This is easily done with a spatula and special repair kits, which are sold in any hardware and construction stores.
Before starting work, close the skirting boards with adhesive tape. This will reduce the time spent on painting and save you from unnecessary work in the future.
Before you start, close the skirting boards with adhesive tape
Step-by-step instructions for coloring
After choosing the right paint for your case and completing the required preliminary preparation of the surface, select a tool for work. You can work with traditional brushes or rollers, or make your task easier by choosing a full-fledged atomizer to achieve your goal. In addition, prepare masking tape, a paint preparation container, and personal protective equipment.
Paint brushes and rollers
When choosing a tool for applying paint, focus primarily on the features of the composition used. A single coat of paint, applied using a modern spray gun, will have quality characteristics that are not inferior to the three-layer paintwork applied by brush or roller.
Sprayer allows you to save time on work and directly finishing material. However, the sprayer may not be used everywhere. For example, to paint corners and all sorts of hard-to-reach areas, you will have to use a simple brush.
For applying enamels and coloring compounds on an acrylic basis, wide rollers with short pile are used. Velor or conventional facade tools allow you to achieve a quick and uniform application of the used paint. For greater convenience, the roller can be mounted on a fairly long handle.
Corners are painted with narrow brushes. All work is reduced to uniform application of the paintwork. If necessary, the floor is pre-primed. It is recommended to start painting from the wall opposite to the exit from the room. Otherwise, you risk creating a “trap” and extra work for yourself.
Start painting the floor from the far corner of the room so as not to fall into the trap
In the case of concrete floors, you can start painting after at least 5-7 days after completion of its pouring.
Paint should be applied with strokes in different directions, and then rub the composition on the floor surface. Layers should not be very dry. It is better to apply 2-3 thin layers than one thick one. This way the coating dries faster and will look better overall. A new layer can be applied only after the previous one dries. This usually takes about 24 hours.
Drying the floor after painting
After applying the last coat of paint, wait until it is completely dry. The optimal conditions for drying are temperatures in the region of +20 degrees and humidity at the level of 75-80%. It is not recommended to exert any mechanical stress on the surface for 3-4 days after the completion of paintwork. The recommended period may vary in accordance with the temperature and humidity conditions in the room.
Also, the drying time of the paint strongly depends on the conditions in which the coloring composition was. For example, if freshly poured concrete was painted, drying will take much longer. In this situation, the polymerization will end in about 5-7 days, after reaching the maximum values of chemical and mechanical resistance. It is important to let the paint dry completely so that it can gain maximum wear resistance.
Thus, using paint, you can not only transform the appearance of the floor, but also improve its quality and performance. However, a positive result and a long service life of the coating can be expected solely subject to the competent and consistent implementation of each stage. Focus on the proposed instructions and you will succeed. Have a good work!